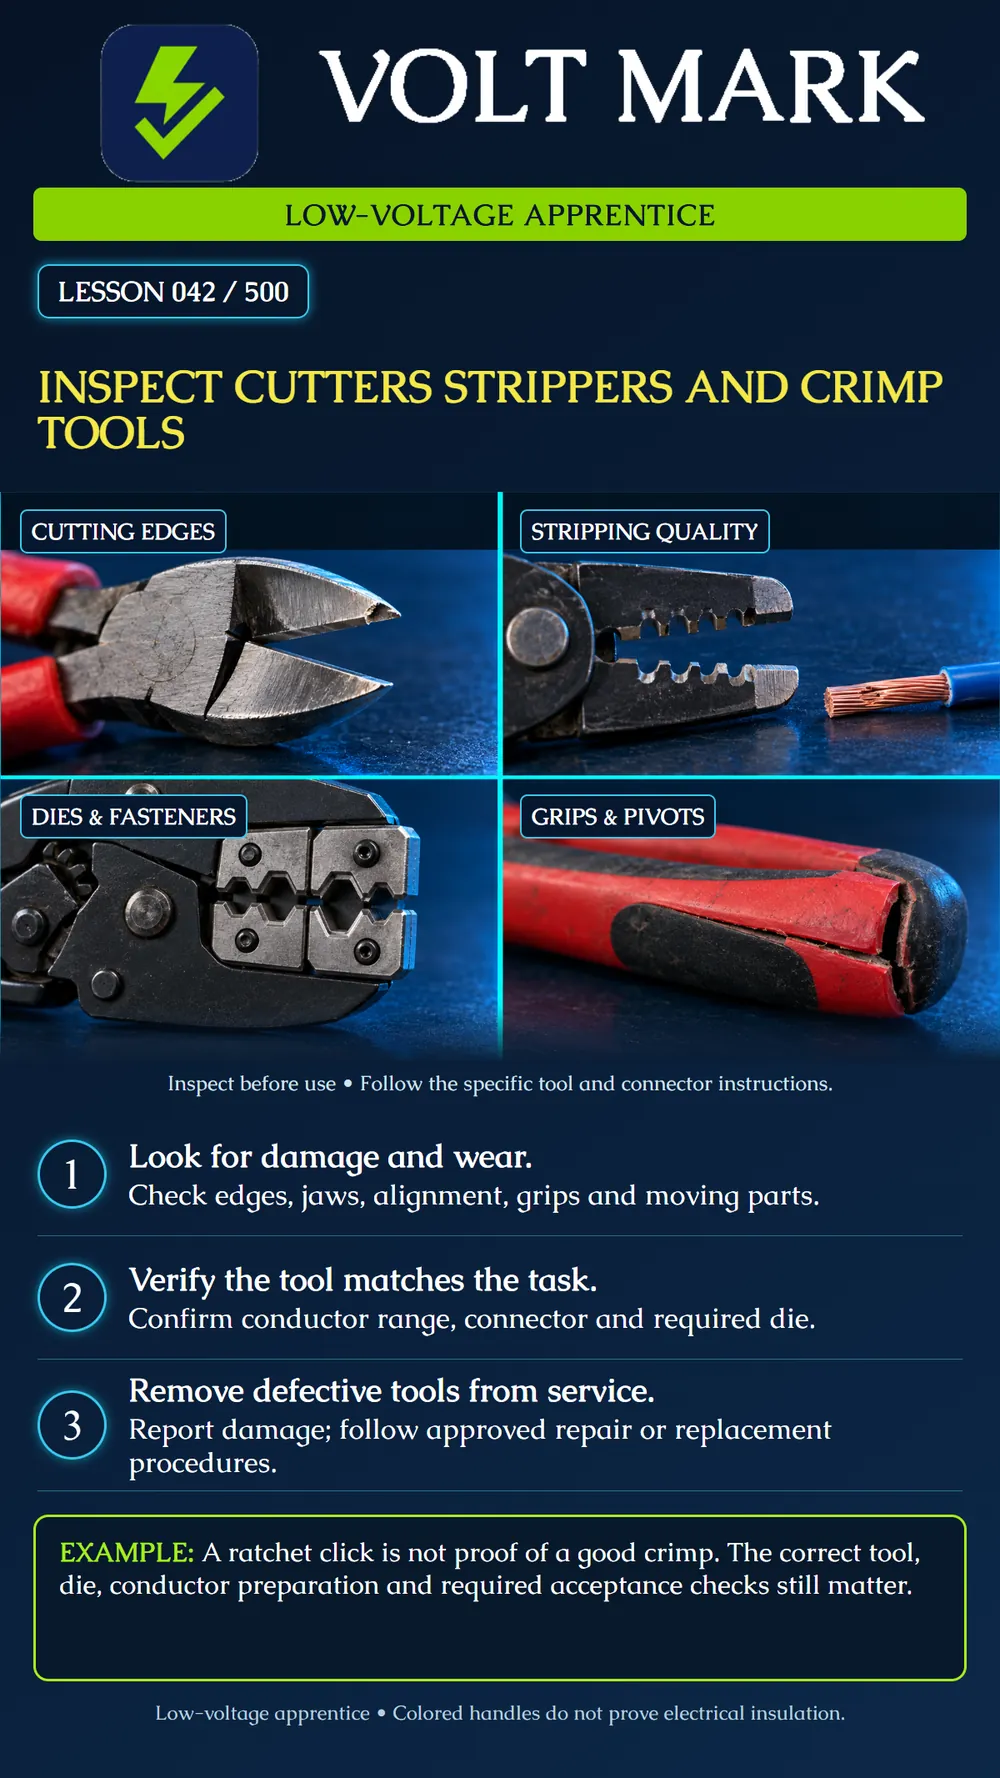
Before preparing a low-voltage cable or connector, inspect the tool, confirm its compatibility, and decide whether it is ready for use or must be removed from service.
A damaged cutter can deform a conductor. A worn or incorrectly selected stripping opening can nick copper or remove strands. A loose, damaged, or incompatible crimp die can produce a connection that looks finished but does not meet the connector manufacturer's requirements. Inspection belongs before the work, not only after a connection fails.
Read the tool identification and instructions. Confirm the cable material, conductor construction, size range, connector family, and intended operation. A tool suitable for one connector is not automatically suitable for another that looks similar. Ordinary copper cable tools do not replace fiber preparation tools. Follow the fiber tool manufacturer's blade, coating, and diameter requirements.
With the tool unused and positioned safely, examine the cutting edges for chips, cracks, excessive wear, and poor alignment. Check the pivot, handles, and return spring where fitted. Keep fingers away from the cutting edges. Do not test sharpness with a finger or attempt to compensate for damage by squeezing harder. Use the tool only on materials and sizes it is designed to cut.
Look for damaged cutting surfaces, debris, loose adjustments, and markings that can no longer be read. Select the correct setting or opening for the actual conductor and insulation. Where the instructions permit a sample check, use a suitable offcut and inspect the result. Look for nicked copper, missing strands, stretched insulation, and an incorrect strip length. A clean-looking sample supports setup verification; it does not eliminate ongoing workmanship checks.
Verify the exact tool-and-die combination against the connector instructions. Examine die surfaces, fasteners, alignment, locators, and wire stops where present. Check the handles and mechanism using the manufacturer's inspection procedure. Some ratcheting tools control completion of the tool stroke, but a click does not prove that the connector, conductor, strip length, or die was correct. Do not make arbitrary ratchet adjustments or substitute dies based on appearance. Required sample inspections, gauges, or pull testing depend on the specified termination process.
Inspect grips for splits, looseness, contamination, and other damage. Colored handles alone do not establish an electrical insulation rating. Even an insulated tool requires inspection and does not authorize energized work. If damage or abnormal operation is found, stop using the tool, identify it as unavailable, and report it through the employer's process. Follow the manufacturer and employer for repair, replacement, or disposal. Wrapping tape over a failed grip is not an approved repair.
An apprentice is preparing stranded copper conductors for a specified terminal. The cutter has a chipped edge, the stripper leaves a mark on the copper, and the crimper contains a die intended for a different terminal family. All three findings require action before installation. Obtain a suitable serviceable cutter. Correct the stripping setup and check an approved sample. Install the specified compatible crimp tooling through the authorized process. Then perform the termination and acceptance checks required for that terminal. Passing one inspection does not excuse a failure in another step.
Using disconnected samples and the employer's procedure, identify the tools needed for a termination. Find their identification and compatibility information. Inspect without placing fingers between jaws. Explain which defects require removal from service. Demonstrate a sample preparation check only when trained and authorized. Record defects and the action taken.
Answer: No. Compatibility, preparation, placement, condition, and specified acceptance checks still matter.
Answer: No.
Answer: Stop, check tool condition and compatibility, correct the setup under the applicable instructions, and verify the result before continuing.
The photographs illustrate inspection areas and damage examples; they are not acceptance gauges or model-specific instructions.
TE Connectivity, Straight Action SDE Hand Tools: https://www.te.com/en/products/application-tooling/hand-crimping-tools/intersection/straight-action-sde.html TE Connectivity, CERTI-CRIMP Hand Tools: https://www.te.com/en/products/application-tooling/hand-crimping-tools/intersection/certi-crimp-hand-tools.html?tab=pgp-story Klein Tools, Insulated Slim-Handle Diagonal Cutting Pliers: https://www.kleintools.com/catalog/electricians-pliers/diagonal-cutting-pliers-insulated-slim-handle-8-inch Sources checked September 30, 2026. Product-specific instructions apply to their respective tools.
Free study material for low-voltage apprentices. This is a national foundation course: requirements differ by state and by local jurisdiction, and a practice that is common in one place is not a rule everywhere. Nothing here is a licence, a certification, or authority to work unsupervised, and completing it does not count as apprenticeship hours or continuing-education credit. Check the codes adopted where you are working, the licensing authority for that work, and your employer's safety programme. VoltMark is not affiliated with, endorsed by, or sponsored by NFPA, OSHA, NICET, BICSI, FOA, or any state or local licensing authority.

Electrician licensing exam prep: practice questions, timed exam simulations, and step-by-step help finding every answer in the NEC.