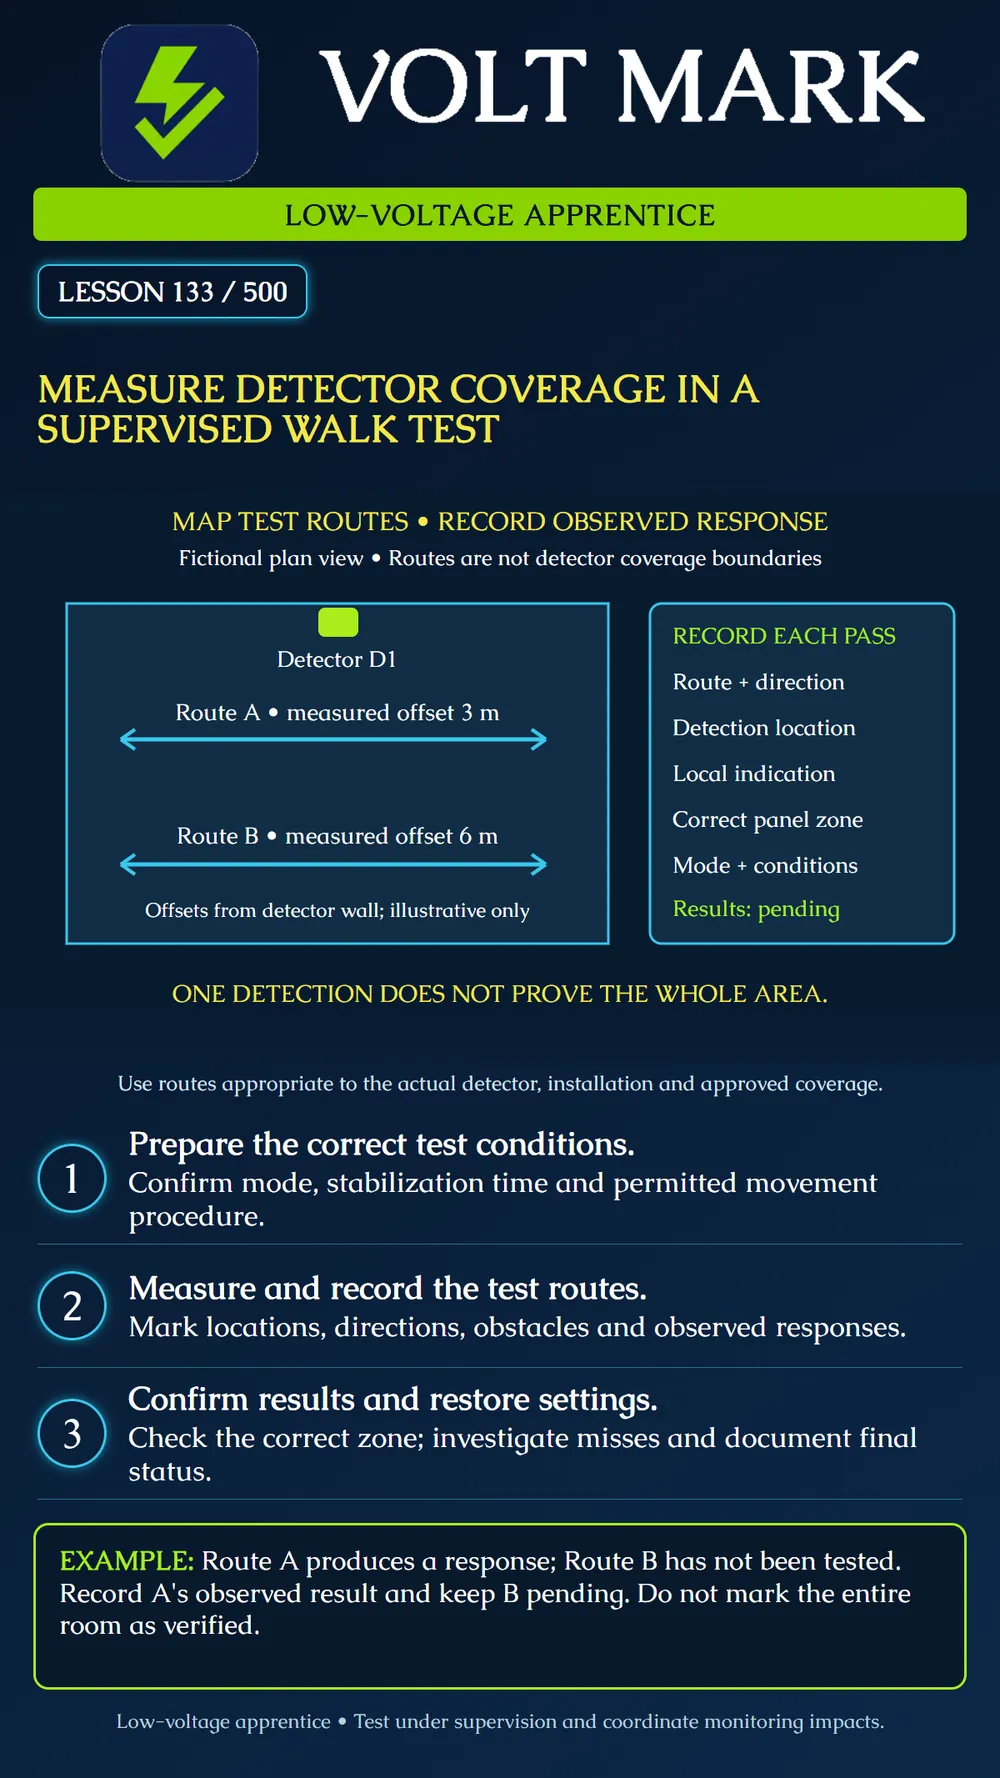
Measure and document selected walk-test routes, observe detector and system responses, and limit conclusions to the evidence collected.
A walk test evaluates detection in the installed conditions using the manufacturer's procedure. It is not simply walking past the detector once. Plan the required locations and movement directions, identify what response will be observed, and record the conditions that affect interpretation.
OPTEX's published guidance emphasizes testing each installation to confirm detection where intended. As a specific example, Visonic's MP-840 K9-85 instructions call for walking across the far end of its pattern in both directions and describe a timed walk-test mode. Those instructions illustrate the importance of direction and mode; do not copy that detector's times or settings into every product.
Prepare the selected model according to its instructions. Confirm stabilization time, test-mode entry and expiry, indication behavior, movement speed and any pause or retrigger requirements. A wireless device's normal battery-saving behavior can differ from its test behavior. A missed repeat indication may therefore require checking the test conditions before concluding that coverage is absent.
Confirm monitoring coordination and local impacts before operating a live training system. A detector test mode and a panel walk-test mode are different features. The cited DSC installer walk-test description notes that zone activation can produce an actual alarm. Do not assume that a menu named walk test prevents reporting or sounder operation.
The poster shows detector D1 on a wall and two transverse walking routes. Route A is illustrated at a measured offset of 3 m from the detector wall; Route B at 6 m. These are fictional planning dimensions, not a manufacturer's rated range or required test spacing. The drawing is illustrative, not a scaled coverage map.
Use a suitable measuring method to locate the actual approved test routes. Record the reference wall or point and units. Add the route endpoints or other coordinates needed for another technician to repeat the path. An offset alone does not define a complete route.
Walk in the instructed direction and at the specified pace. Repeat in the other direction where required. Mark the position at which a response was observed and how it was identified. Record the detector indication and correct panel-zone response separately. Neither automatically proves monitoring receipt; verify that independently if the approved test requires it.
The poster's arrows indicate movement, not emitted beams or a guaranteed detection boundary. Both routes begin with results pending. No real room or detector was tested to create this lesson.
If Route A produces the expected response and Route B has not been tested, record those states separately. Do not shade the whole room as covered. A pass documents the tested conditions and acceptance criteria, not every possible person, movement or future room arrangement.
Record mounting details, lens or masking configuration where applicable, relevant settings, obstructions and environmental conditions. Stored goods or changed furniture can affect the installed arrangement. Describe what was present at the time rather than silently assuming an empty room.
When a required pass does not produce the expected result, stop and review the setup with the supervisor. Check the correct device and zone, test-mode status, stabilization and pause requirements, route, obstacles and permitted adjustments. Do not immediately increase sensitivity to hide a missed response. Any approved adjustment needs appropriate retesting, including review of unwanted detection.
Complete the planned observations, document exceptions and return the equipment to its approved operating configuration. Check covers, settings and relevant trouble indications. Confirm monitoring status and any required final system state. Keep unresolved coverage questions open for the responsible designer or installer; do not approve a design change from this exercise alone.
Using a training plan, mark two instructor-approved routes with dimensions, reference points and directions. Have one learner perform the authorized movement while another records the observed locations and indications. Repeat as required by the equipment procedure. Swap observers and see whether the record is detailed enough to repeat the route.
Detector tag/model; zone; mounting and lens details; settings; instruction revision; test-mode start/expiry; stabilization/pause requirements; route coordinates and units; direction and prescribed pace; response location; detector indication; panel identity/result; conditions/obstructions; acceptance criteria; corrections/retest; final status.
Checked September 30, 2026: OPTEX America, FAQ: https://optexamerica.com/faq Visonic / Johnson Controls, MP-840 K9-85, Walk Testing: https://docs.johnsoncontrols.com/visonic/r/Visonic/en-US/MP-840-K9-85-ZigBee-Installation-Guide/Rev.-2/02/Walk-Testing DSC / Johnson Controls, PowerSeries Pro, Installer Walk Test: https://docs.johnsoncontrols.com/dsc/r/DSC/en-US/PowerSeries-Pro-Reference-Manual/1.3.1/Configuration/Testing-the-system/Installer-Walk-Test The route diagram and recording activity are original instructional material. No coverage certification or actual test results are claimed.
Free study material for low-voltage apprentices. This is a national foundation course: requirements differ by state and by local jurisdiction, and a practice that is common in one place is not a rule everywhere. Nothing here is a licence, a certification, or authority to work unsupervised, and completing it does not count as apprenticeship hours or continuing-education credit. Check the codes adopted where you are working, the licensing authority for that work, and your employer's safety programme. VoltMark is not affiliated with, endorsed by, or sponsored by NFPA, OSHA, NICET, BICSI, FOA, or any state or local licensing authority.

Electrician licensing exam prep: practice questions, timed exam simulations, and step-by-step help finding every answer in the NEC.