Observe an opening's mechanical operation, distinguish closure from latch engagement and document alignment concerns for authorized correction.
Access-control troubleshooting includes the physical door. An electrical command cannot correct a door that binds or a latch that does not engage its intended strike. Start by understanding the approved mechanical arrangement and the operating sequence to be checked.
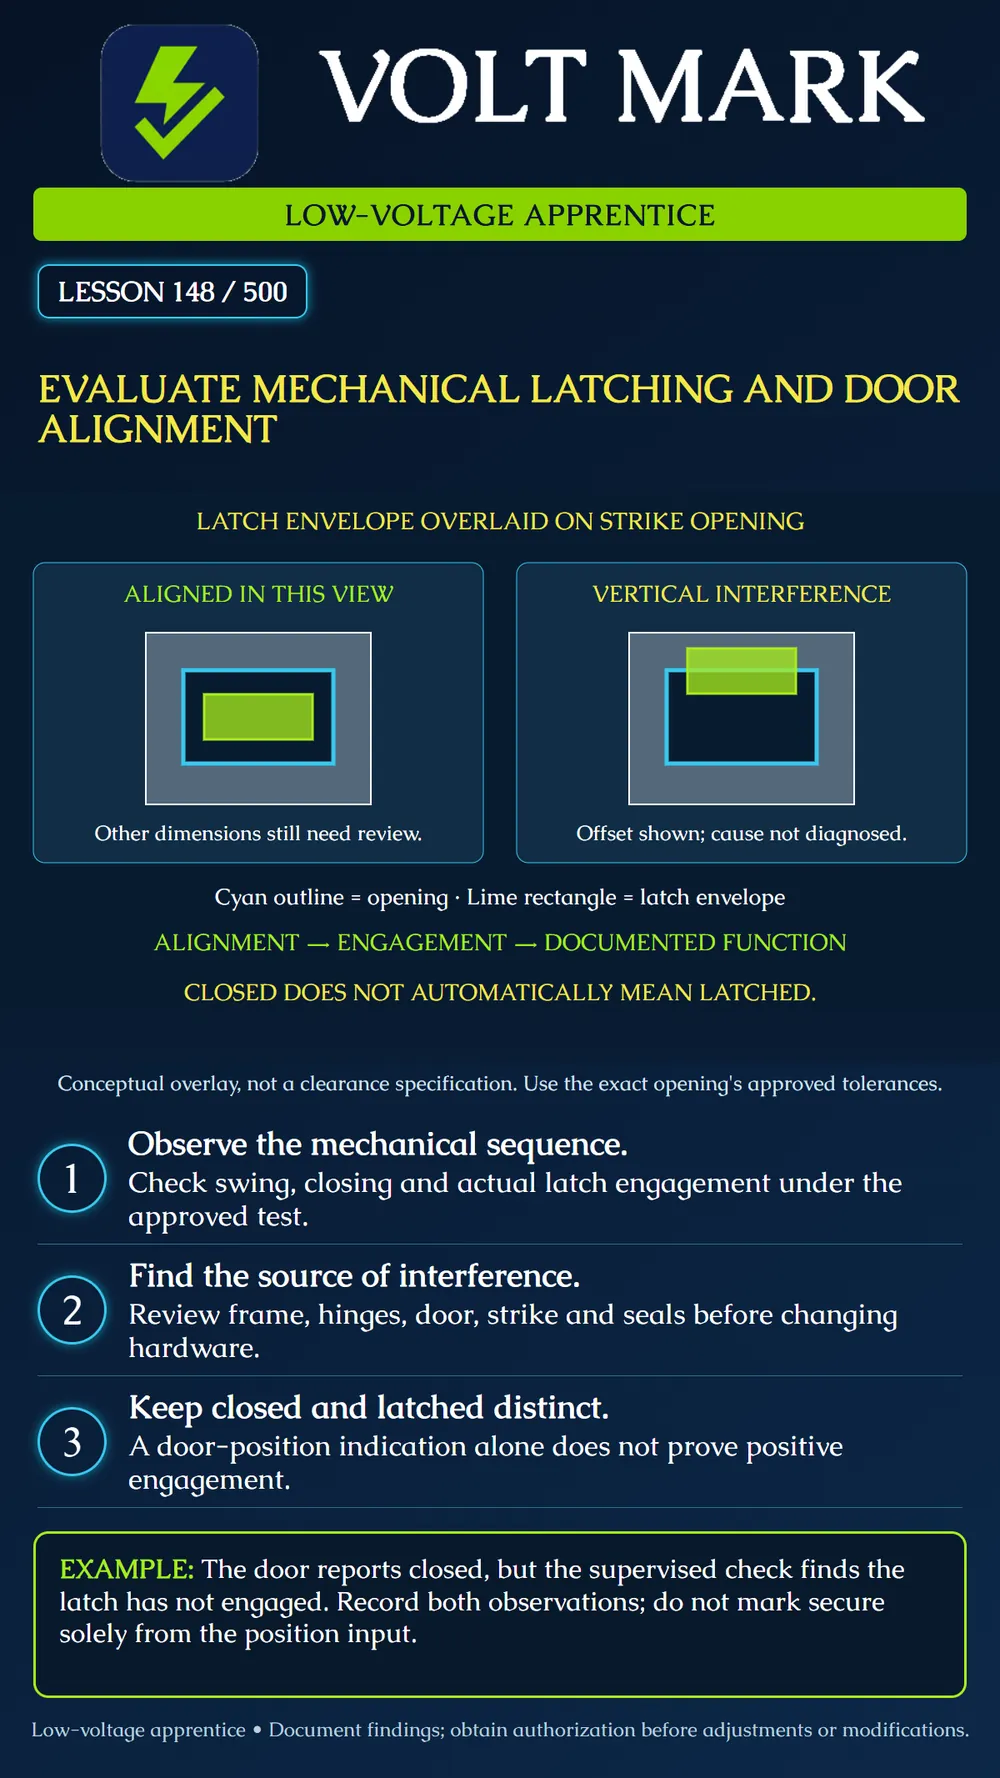
The poster uses a simplified front-view overlay. The cyan rectangle represents the strike opening and the lime rectangle represents the latch envelope projected onto that plane. The left example shows alignment in this one view. The right example shows a vertical offset and overlap with the strike plate. Neither drawing establishes required engagement depth, actual clearances or complete installation suitability.
An observed offset is evidence of a relationship, not its cause. Do not immediately conclude the strike was installed incorrectly. The door, frame, hinges, hardware preparation and other opening components may need evaluation. The Steel Door Institute advises checking frame installation before hardware adjustments and describes alignment conditions that can cause binding. Use the applicable product and opening requirements to determine the actual problem.
Closure and latching are distinct. A leaf can appear closed while the latch is not properly engaged. A door-position input also has a specific sensing function; it is not independent proof of latch engagement. Record these observations separately rather than calling the opening secure from a single status display.
A mechanical check should follow the approved procedure for the installed hardware. Observe whether the leaf travels normally, reaches its intended closed position and performs the specified latching function. Do not force it through resistance or use repeated slamming as a substitute for diagnosis. Observe required exit operation separately.
A supervised trainer reports door closed. The instructor's prescribed engagement check shows that the latch has not seated. The trainee writes "closed but not positively latched under the demonstrated check." This is more accurate than "all good" or "bad sensor."
Next, the instructor supplies a front-view photograph showing vertical interference. The trainee records that observation and lists evidence still needed: opening identification, hardware model, documented preparation and evaluation of the door/frame relationship. The trainee does not specify cutting the strike from the photograph alone.
The supervisor later provides an authorized corrective-action record. The learner compares the before and after findings and the relevant retest. The lesson teaches how to evaluate and document the sequence; it does not claim that any real opening was adjusted or accepted.
Identify the opening and its hardware set. Read the relevant operating instructions and approved test conditions. Observe movement and the location of any rubbing or resistance. Observe the final leaf position and specified engagement separately. Record any position-switch indication as its own observation. Compare findings with the documented requirements. Escalate unresolved mechanical or design conflicts before dependent work.
Keep objective details with the record. "Rubbing observed at the upper latch-side edge during the final portion of travel" gives a reviewer more useful information than "door sticks." Do not invent measurements. If a dimension is needed, use the approved method, instrument and reference, and include units.
A low-voltage task does not automatically authorize altering a rated door, frame or hardware. Do not file a strike, bend a hinge, relocate hardware or increase closer force simply because it seems likely to eliminate the symptom. Obtain the appropriate authorized correction and manufacturer guidance. Preserve labels and document changes.
Not every opening uses the same latch or strike. Use the scheduled hardware and its instructions to determine what engagement means for that assembly. Avoid applying a generic gap value or a familiar door's adjustment to another model.
Use an approved sample opening or trainer. Prepare one record for observed leaf closure, one for mechanical engagement and one for position-input status. Have the supervisor explain which checks were performed and which conditions remain untested.
Interpret the poster's two overlays. Identify the offset in the right view. Explain why the aligned left view cannot establish engagement depth or prove the complete opening works. This reinforces the distinction between a useful diagram and complete field evidence.
Opening / hardware set / revision: Approved check and conditions: Movement or interference observation: Leaf closure observation: Latch engagement observation: Position input indication: Measurements with units, if authorized: Relevant manufacturer requirements: Unresolved cause / responsible reviewer: Authorized correction and retest reference:
Does a closed indication prove latching? No. Does the offset overlay identify the root cause? No. Does alignment in one view establish complete suitability? No. Should increasing closer force be the automatic first response? No. What supports closing an issue? The authorized correction and relevant documented verification, not appearance alone.
Primary industry sources checked September 30, 2026: Steel Door Institute, SDI122-21, reaffirmed2026, Installation Troubleshooting Guide: https://steeldoor.org/sdi-122/ Steel Door Institute, Maintenance of Standard Steel Doors and Frames: https://steeldoor.org/sdi-124/ Source use is limited to mechanical-operation and alignment principles. The diagram, scenario and observation record are original teaching examples, not fabrication or adjustment instructions.
Free study material for low-voltage apprentices. This is a national foundation course: requirements differ by state and by local jurisdiction, and a practice that is common in one place is not a rule everywhere. Nothing here is a licence, a certification, or authority to work unsupervised, and completing it does not count as apprenticeship hours or continuing-education credit. Check the codes adopted where you are working, the licensing authority for that work, and your employer's safety programme. VoltMark is not affiliated with, endorsed by, or sponsored by NFPA, OSHA, NICET, BICSI, FOA, or any state or local licensing authority.

Electrician licensing exam prep: practice questions, timed exam simulations, and step-by-step help finding every answer in the NEC.