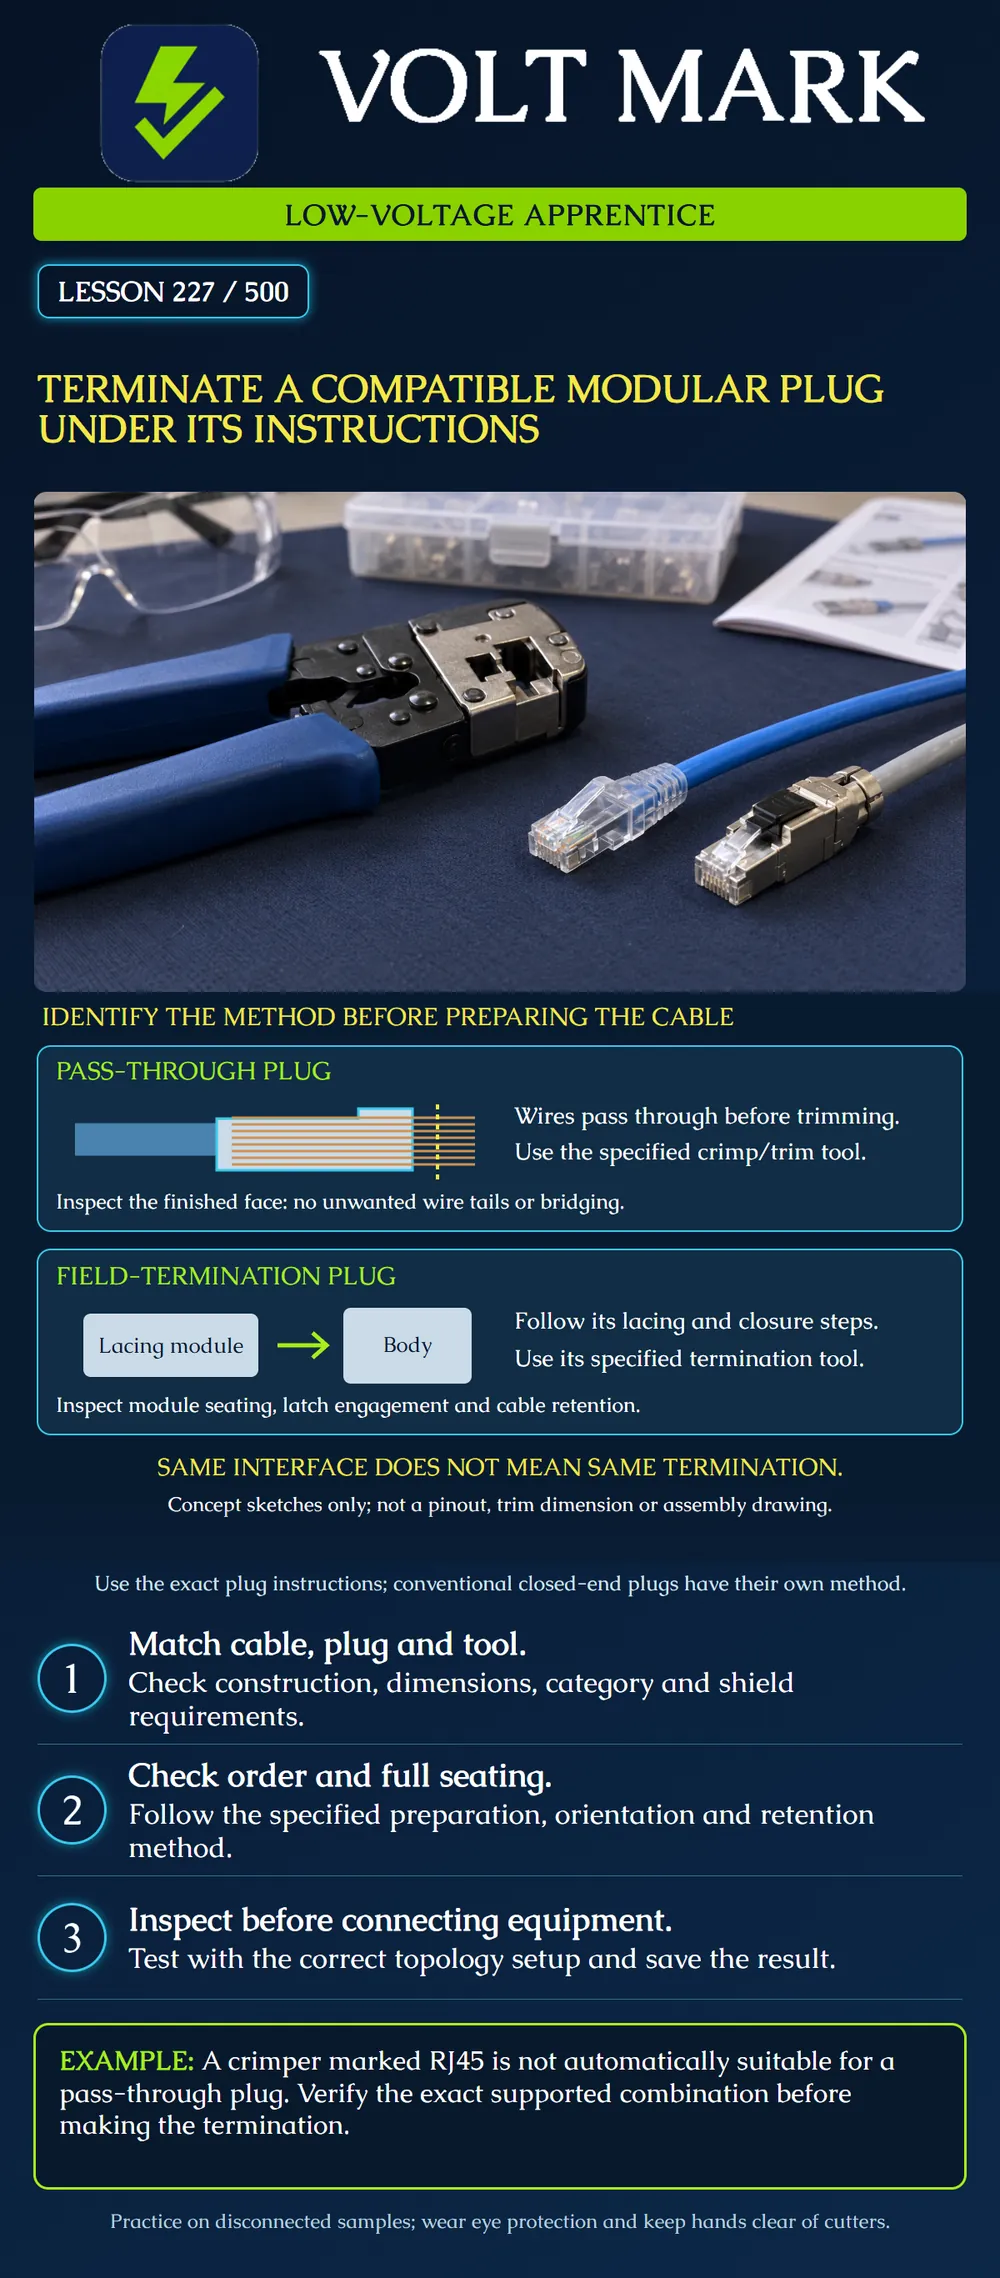
Identify a supported cable/plug/tool combination, follow its termination method on a disconnected sample, and inspect and test the completed work. This lesson is not a universal crimping recipe.
Carry forward Lesson 223's checks: exact parts, conductor construction and gauge, insulation diameter, overall cable diameter, shielding, category and intended environment. A familiar RJ45 mating interface does not establish that the cable fits the contacts or retention system. Set up a dry, supervised practice station with eye protection, the specified tools and a known isolated cable. Neither end may connect to equipment, PoE or another power source while being terminated. Record the sample ID and the required wiring scheme before preparation.
Klein's referenced CAT6A UTP pass-through instructions describe feeding conductors through the body, then using a pass-through crimping tool to crimp and trim. The document recommends the VDV226-110 and calls for inspection and testing afterward. The tool must suit that connector's method; an RJ45 label alone is insufficient. [1] Siemon's Z-PLUG instructions instead use a termination module, cable-specific preparation, conductor lacing and assembly into the plug body. They specify the Z-PLUG termination tool, seating and latching checks, and separate preparation illustrations for different cable constructions. [2] The poster sketches illustrate this difference only. They are not scaled product drawings. A conventional closed-end crimp plug follows its own insertion, trimming and crimping instructions; do not push conductors through a closed nose.
Cable part: Plug exact part: Tool and die/blade: Current instruction revision: Chosen scheme: Intended topology: Instructor: Before cutting anything, fill in these entries. If the intended plug or tool cannot be identified, stop preparation and resolve the missing information. Do not assume two clear plastic plugs are interchangeable.
Read the entire product procedure so accessories that must be installed first are not forgotten. Prepare the jacket, separator and any shield under the correct instructions for that construction. Protect conductor insulation and preserve pair geometry as required. Do not strip insulation from each conductor merely because the contacts need to make electrical contact. Follow the product's contact method. Inspect the prepared end before proceeding; nicked or cut conductors need an approved correction, not concealment inside the plug. Use the manufacturer's orientation drawing and the selected wiring scheme to arrange the conductors. The pin table in Lesson 224 is a reference for assignments, not a substitute for the actual plug's viewing direction.
Fully position the conductors and jacket or cable-retention components as directed. Check the order before the irreversible step. For a pass-through design, visible conductor tails can help confirm the arrangement, but they do not prove every internal contact is properly seated. Use the specified tool and complete its instructed cycle with hands clear of the cutting mechanism. A field-termination design may instead require its module to be fully seated and latched in a dedicated tool. Do not force an assembly that sits unevenly. Recheck orientation and compatibility first.
Inspect the contact area, body, latch, wire position and jacket retention. Look for unwanted protruding wire, loose clippings, possible bridging, a cracked housing or incomplete closure. Where a shield is required, follow the specific shield termination and inspection method. Do not assume a metal shell alone proves shield continuity. The two manufacturer methods are not interchangeable repair procedures. Whether a plug can be reopened or reused depends on that product. Do not repeatedly crimp a damaged plug and assume the extra force corrected the cause.
A learner uses a tool that presses the contacts but leaves conductor ends extending beyond a pass-through plug's face. They propose connecting it to a spare switch to see whether it works. The instructor keeps it disconnected. Identify the unsupported tool or cutting fault, inspect the plug and follow the manufacturer's permitted correction or replacement method. Never use a live equipment port as the inspection fixture for a visibly unfinished plug.
A field-termination module remains visibly short of its specified latched position. The cable shows basic continuity. The learner calls it accepted. The correct decision is to resolve the mechanical assembly issue before acceptance. A limited electrical indication does not override an incomplete closure or missing retention part. Record the correction and repeat the required tests.
A panel-to-field-plug installation and a plug-to-plug cord are different test configurations. Use the supported adapters and limits for the intended arrangement. Refer to Lesson 222 for MPTL boundaries. Do not rename a channel test or a continuity check as complete plug or category certification. Save sample ID, endpoints, method, tester setup, measured result, inspection findings and any repair/retest history. Human practical assessment is separate from the poster's completion.
Does any RJ45 crimper support any RJ45 plug? No. Should a closed-end plug be treated as pass-through? No. Is a basic continuity result enough to accept an incomplete latch? No. May a visibly unfinished plug be tried in powered equipment? No. What controls reuse and correction? The exact product instructions.
The instructor supplies three fictional inspection cards for disconnected P-227 samples. A has the specified pass-through plug but a tool with no supported flush-trimming function. B has the correct field-plug tool but an incompletely seated module. C has the documented compatible parts and completed assembly, but only a continuity result where the work card requires certification. For each, identify the unresolved item and what evidence would close it. Do not try the samples in a switch.
Answer: A needs a supported termination method and a finished-work inspection after permitted correction or replacement. B needs the documented seating/latching condition plus retesting. C needs the required topology-specific certification result. None can be accepted from the supplied information; a connector label, electrical indication or neat finish alone does not close the missing evidence.
Mistake: Using an ordinary crimper on a pass-through plug and accepting protruding conductor tails. Correction: Keep the sample disconnected; verify the supported crimp/trim tool and follow the permitted correction or replacement process.
Mistake: Accepting a field module that has continuity but has not reached its specified latched position. Correction: Resolve the incomplete assembly and retention under its instructions, then inspect and repeat the required tests.
Mistake: Treating a panel-to-field-plug link as an ordinary plug-to-plug cord during test setup. Correction: Record the actual endpoints and select the supported adapters and limit for that topology before claiming certification.
Why check conductor order before an irreversible crimp?
Answer: The completed contact operation may not be reusable; checking early avoids concealing a known assignment fault inside the plug.
Why is the plug's viewing direction part of the instructions?
Answer: A pin table gives assignments, while physical orientation determines where those assignments go on that product.
[1] Klein Tools, Pass-Thru CAT6A UTP Data Plugs, VDV826-704, 1330856 Rev. 02/21 B. https://data.kleintools.com/sites/all/product_assets/documents/instructions/klein/PassThru_CAT6A_VDV826704_764_Manual.pdf [2] Siemon, Z-PLUG Termination Instructions, Rev. B 12/18, 100.24877.00. https://files.siemon.com/en/instruction/wa_z-plug-termination_ii.pdf These are documented product examples; verify the current revision for the actual part. No generic shield-removal rule or strip length is inferred across products.
Texas journeyman, 15 questions, scored by topic against the 70% mark. No card, and no account needed to start.
Free study material for low-voltage apprentices. This is a national foundation course: requirements differ by state and by local jurisdiction, and a practice that is common in one place is not a rule everywhere. Nothing here is a licence, a certification, or authority to work unsupervised, and completing it does not count as apprenticeship hours or continuing-education credit. Check the codes adopted where you are working, the licensing authority for that work, and your employer's safety programme. VoltMark is not affiliated with, endorsed by, or sponsored by NFPA, OSHA, NICET, BICSI, FOA, or any state or local licensing authority.

Electrician licensing exam prep: practice questions, timed exam simulations, and step-by-step help finding every answer in the NEC.