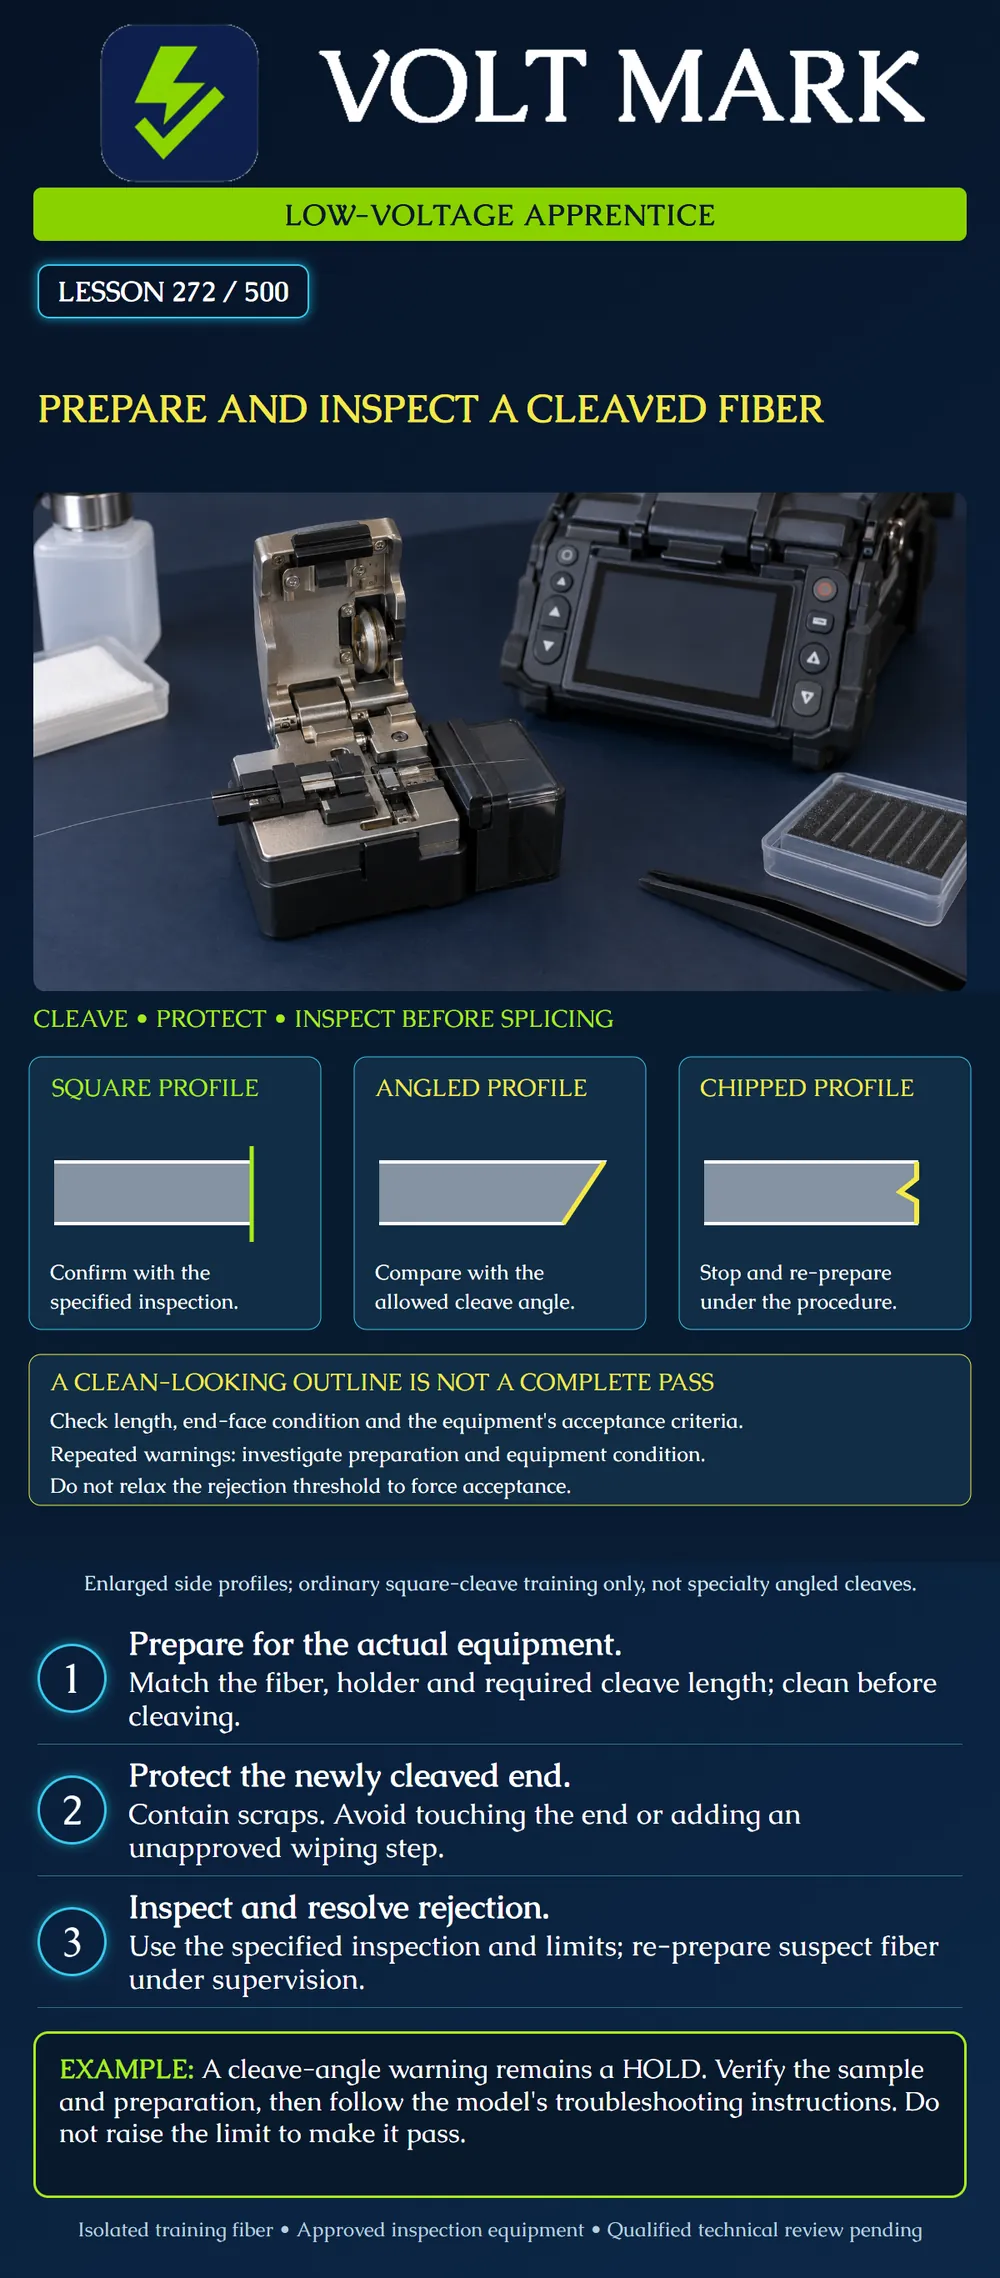
Prepare a known isolated training fiber for an ordinary square-cleave splice exercise and explain how to respond to an unacceptable cleave. Use the actual equipment instructions and instructor-selected acceptance criteria.
Lesson 271 addressed coating removal and cleaning. This lesson addresses the next preparation step. A cleaver produces the end needed for the selected splice or termination method. It is a precision tool, not a substitute for ordinary wire cutters.
The poster compares enlarged side profiles. A straight outline is only one feature of a candidate cleave; it cannot prove microscopic surface quality, correct length or suitability for a particular process. The illustration is not a real camera image and cannot serve as an acceptance standard.
Some specialty processes deliberately require angled cleaves. They are outside this ordinary square-cleave exercise. Do not apply this poster's simplified comparison to such a process without its specific instructions.
Before work, identify the sample, glass and coating dimensions, cleaver, holder or adapter, and intended receiving equipment. Confirm that the parts work together. Read the preparation length from the specified procedure and its defined reference point.
AFL's CT16 documentation illustrates why a remembered dimension is insufficient: its supported configurations distinguish adapters, coating sizes and holders. This lesson deliberately supplies no universal cleave length. A tool's available range does not by itself specify the correct setting for a splice or connector.
Prepare a practice record before handling the sample. Leave an unresolved entry marked HOLD rather than filling it with an assumption. If the instructor changes the holder, reassess the configuration instead of silently carrying forward the old setup.
Confirm the sample is isolated from optical sources. Use the clean workstation, required eye protection and fiber-scrap controls already taught. Check the cleaver condition and collector according to its manual. Keep hands clear of the blade and mechanism.
Strip and clean using the approved method, then position and secure the sample as the equipment instructions require. Perform the cleave only with the correct setup. This overview intentionally omits hand placement, blade adjustment and maintenance instructions; those must come from the actual model's procedure.
Keep the useful prepared fiber separate from the cut-off scrap. Verify that the scrap was captured, and follow the collector service instructions when needed. If a fragment escapes, stop and use the established recovery process.
Avoid touching the prepared end or placing it on the bench. Transfer it in the prescribed holder or handling arrangement. Do not add a wiping step to the newly cleaved end unless the actual procedure requires it. If it is contaminated or damaged, stop and use the approved re-preparation method.
Use the approved equipment and its displayed views, measurements and messages. Do not look into a fiber or improvise direct optical inspection. The instructor must identify the inspection arrangement intended for bare cleaved fiber; a connector inspection accessory is not automatically appropriate.
AFL's 90R troubleshooting guide distinguishes excessive cleave angle from an end-face shape that is not flat and smooth. Its angle criterion depends on the selected splice mode. It also explains that dirty camera optics can produce misleading readings. These points support checking both preparation and equipment when warnings repeat. Model-specific cleaning, blade servicing and thresholds must remain model-specific.
An inspection result permits the next preparation or splicing step only under the applicable procedure. It is not evidence that a finished link has passed its required acceptance tests.
Case A: The end appears square in a simplified sketch, but the preparation length was never verified. Disposition: HOLD. A favorable shape does not supply the missing setup evidence.
Case B: The equipment reports an excessive cleave angle. The trainee proposes raising the permitted angle. Disposition: do not change the acceptance criterion to force a pass. Follow the approved preparation and troubleshooting process.
Case C: Several fresh samples show the same warning. Disposition: stop repeating the cycle without investigation. Record the message and seek the instructor's equipment-condition checks.
Case D: The prepared end touched the bench during transfer. Disposition: stop and re-prepare according to the procedure; do not assume a visually clean end is uncontaminated.
Case E: A specialty job calls for an intentional angled cleave. Disposition: this lesson's ordinary square-cleave criteria do not authorize that job. Obtain the specialty procedure and suitable equipment.
Sample ID / isolation verified: Fiber dimensions and type: Cleaver / holder / adapter: Receiving equipment and procedure revision: Required length and reference point: Observed preparation result: Inspection method / views / messages: Disposition and reason: Instructor check:
A fictional trainee changes the holder, retains the previous preparation length without checking its reference point, and obtains a square-looking end. The reviewer marks the sample HOLD: appearance cannot resolve an unverified configuration. The instructor checks the receiving equipment's procedure and the new holder arrangement before authorizing preparation again. After preparation with the verified setup, repeated cleave-angle warnings still occur. The reviewer records the messages and refers equipment-condition checks to the instructor rather than raising the permitted angle. A later acceptable inspection permits only the next approved step; it does not provide a finished link test result. This case deliberately supplies no universal length or angle limit.
Mistake: Carrying the old length setting into a new holder because the fiber itself did not change. Correction: Recheck the holder, adapter, receiving equipment and defined length reference against the applicable procedure before preparing another sample.
Mistake: Raising the cleave-angle limit to accept repeated rejected samples. Correction: Retain the required acceptance criteria, record the warning and follow the authorized preparation and equipment troubleshooting process.
Mistake: Treating a square-looking profile as enough to release a fiber whose end touched the bench. Correction: Mark the contact contamination as a hold and follow approved re-preparation, then perform the required inspection again.
AFL, Fujikura CT-16 Fiber Cleaver: https://www.aflglobal.com/en/products/fusion-splicing/field-fusion-splicing-equipment/cleavers/ct16-fiber-cleaver Manufacturer reference for configuration-dependent preparation and tool identification, not universal dimensions.
AFL, 90R Splicer Error Code and Troubleshooting Quick Guide, AN-3042, Revision 0, September 22, 2023: https://learn.aflglobal.com/_pfcdn/assets/preprocessed/11221/39875e23-7faa-405c-8686-542b33a4ad5a/39875e23-7faa-405c-8686-542b33a4ad5a.ab602f8a-a91d-4a23-8eef-9f22f2d43653 Manufacturer troubleshooting reference. Relevant sections: Large Cleave Angle, Cleave Shape NG and Dust After Dust Check. No blade-count, arc setting, solvent specification or maintenance sequence generalized to other models.
Texas journeyman, 15 questions, scored by topic against the 70% mark. No card, and no account needed to start.
Free study material for low-voltage apprentices. This is a national foundation course: requirements differ by state and by local jurisdiction, and a practice that is common in one place is not a rule everywhere. Nothing here is a licence, a certification, or authority to work unsupervised, and completing it does not count as apprenticeship hours or continuing-education credit. Check the codes adopted where you are working, the licensing authority for that work, and your employer's safety programme. VoltMark is not affiliated with, endorsed by, or sponsored by NFPA, OSHA, NICET, BICSI, FOA, or any state or local licensing authority.

Electrician licensing exam prep: practice questions, timed exam simulations, and step-by-step help finding every answer in the NEC.